Saturday 30 May 2015

Seven Segment LED display with Arduino and Proteus

In a simpler view seven segment led display have seven led's with their combination we can display decimal numerals.

when connecting a common cathode in a proteus i have no idea which pin is associated to the respective led in display so i write a little code to do that work for me.

Code :
/*
Arduino Sketch to find out which pin is Associated with corresponding LED in 7 segment display
Author : Kunchala Anil

 It is a common cathode 7 Segment Display.
 connect the common cathode to ground and all the remaining pins to the Arduino Digital pins 2 to 8
 */

int pin = 2;
int pin_dummy = 2;
void setup()
{
  Serial.begin(9600);
  Serial.println("Hello World");
  for(int i = 2; i <= 8; i++)
  {
    pinMode(i,OUTPUT);
    Serial.print("pin \t");
    Serial.print(i);
    Serial.println("\t is set as Output");
  }//end of for loop

}//end of setup

void loop()
{
  Serial.println("Please enter y");
  while(!Serial.available())
  {
    //wait until user enters the data
  }//end of while
  if(Serial.available())
  {
    if(Serial.read() == 'y')
    {
      if(pin_dummy <= 8)
      {
        digitalWrite(pin_dummy,LOW);
        Serial.println("you entered y");
        digitalWrite(pin,HIGH);
        Serial.print("pin ");
        Serial.print(pin);
        Serial.println(" is activated");
        pin_dummy = pin; // pin_dummy is used to OFF the LED before ON next led in display
        pin++;
      }
      else{
        Serial.println("Maximum pin number is reached");
        pin = 2;
        pin_dummy =2;
        Serial.println("Pin values are RESET");
      }//end of If else

    }
    else{
      Serial.println("you entered wrong character");
    }//end of If Else 
  }//end of If 

}//end of loop

after executing the above code i get the following combination
GFEDCBA for 2,3,4,5,6,7,8 pins respectively.
The following code is used to display the 0-9 in common cathode seven segment display.

/*
hEXA DECIMAL ENCODING FOR DISPLAYING NUMBERS 0 TO 9
 FOR COMBINATION - GFEDCBA to pins 2,3,4,5,6,7,8 
 */
/*
 Hex codes for displayiing respective values
 */
const int ZERO = 0X7E;
const int ONE = 0X30;
const int TWO = 0X6D;
const int  THREE = 0X79;
const int  FOUR = 0X33;
const int  FIVE = 0X5B;
const int  SIX = 0X5F;
const int  SEVEN = 0X70;
const int   EIGHT = 0X7F;
const int  NINE = 0X7B;

//pins initialization
int pin[] = {
  2,3,4,5,6,7,8};

//calculating the no of pins
int no_pins = sizeof(pin)/sizeof(pin[0]);


void setup(){
  Serial.begin(9600);
  //setting all pins as Outputs
  for(int i = 0; i < no_pins;i++)
  {
    pinMode(pin[i],OUTPUT);

  }//end of for loop
}//end of setup


void loop(){
  for(int i=0;i<=9;i++)
  {
    switch(i)
    {
    case 0:
      display_it(ZERO);
      break;

    case 1:
      display_it(ONE);
      break;

    case 2:
      display_it(TWO);
      break;

    case 3:
      display_it(THREE);
      break;

    case 4:
      display_it(FOUR);
      break;

    case 5:
      display_it(FIVE);
      break;

    case 6:
      display_it(SIX);
      break;

    case 7:
      display_it(SEVEN);
      break;

    case 8:
      display_it(EIGHT);
      break;

    case 9:
      display_it(NINE);
      break;

    default :
      Serial.println("something went wrong");

    }//end of switch
  }//end of for loop()
}//end of loop


void display_it(const int value)
{
  for(int i=2,j=0;i<=8;i++,j++)
  {
    digitalWrite(i,bitRead(value,j));

  }
  delay(1000);
}

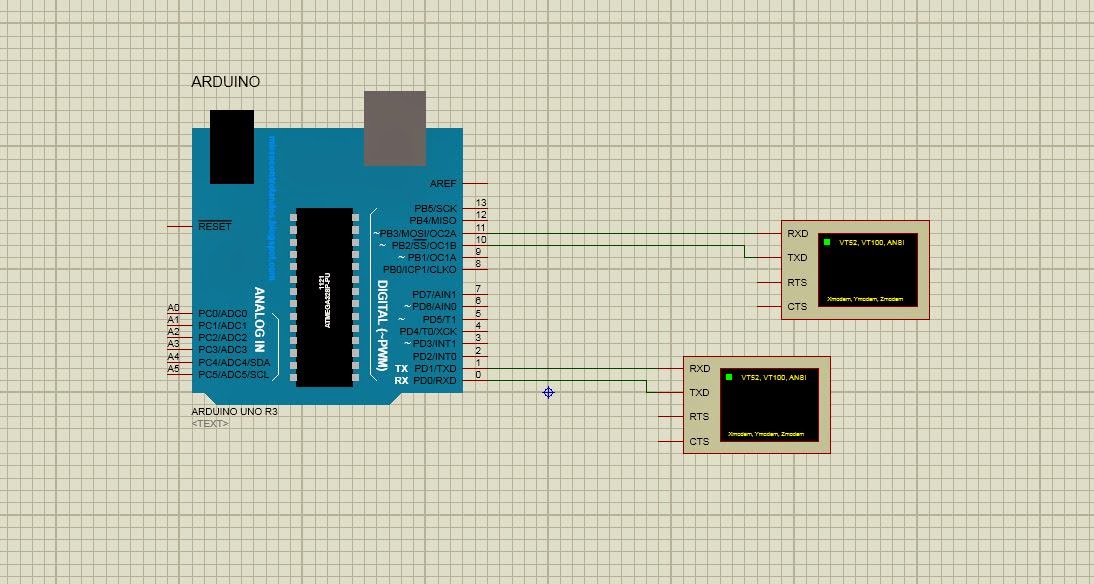
Proteus Schematic is :


size of Array Vs No of elements in Array

If we wanted to determine the size of array.. the first thought we get is use of sizeof operator.

for the beginner level the size of array means number of elements in array.. which is a false assumptions.

Normally there is so much difference between size of array and number of elements in the array.
lets look at the arduino reference about size of


sizeof :
Description
The sizeof operator returns the number of bytes in a variable type, or the number of bytes occupied by an array.
Syntax
sizeof(variable)
Parameters
variable: any variable type or array (e.g. int, float, byte)
As it says it returns the number of Bytes Occupied by an Array in the Memory 

lets try simple code:

int ex_array[ ] = {1,2}; //define array
int ex_array_length = sizeof(ex_array);//find length using sizeof
void setup(){
Serial.begin(9600);
Serial.print("the value sizeof returns is ");
Serial.println(ex_array_length);
}

void loop(){
//do nothing 
}

The Output is :
the value sizeof return is 4

But the ex_array is having only two elements and the program returns 4.
It means that the array named ex_array[ ] occupied 4 bytes of memory. since int is 16 bits which is equivalent to 2 bytes and two integer variables occupy 4 bytes of memory.

To find the No of elements in Array:
To find number of elements in that array we need to divide the value sizeof returns by sizeof datatype of that array.

so No of elements in array = sizeof(array)/sizeof(datatype of array)


int ex_array[ ] = {1,2}; //define array
int ex_array_elements = sizeof(ex_array)/sizeof(int);//find length using sizeof
void setup(){
Serial.begin(9600);
Serial.print("the number of elements in array is ");
Serial.println(ex_array_elements);
}

void loop(){
//do nothing 
}

The Output is:
the number of elements in array is 2

which solves our present problem...

But if we accidently changed the datatype of array there will be nasty bug if we didn't change the bottom datatype also..

so to avoid that problem we can we something like this
No of elements in array = sizeof(array)/sizeof(first number in array)

int ex_array[ ] = {1,2}; //define array
int ex_array_elements = sizeof(ex_array)/sizeof(ex_arry[0]);//find length using sizeof
void setup(){
Serial.begin(9600);
Serial.print("the number of elements in array is ");
Serial.println(ex_array_elements);
}

void loop(){
//do nothing 
}


Thursday 28 May 2015

Interfacing Keypad with Arduino

Keypads Play Vital role in Embedded systems as Human Machine Interface devices.
Interfacing Keypad with arduino very easy.. We can find many tutorials on the web explaining how to do it and many of them are based on the Arduino Keypad library and we can find the sketch for our task....

like many arduino People the only language i know is Arduino Language and I don't want to use that library for simple Keypad interface which involves 12 switches (4 rows and 3 cols) cause i don't understand a bit in it. So i try to write a little code without library.

Basically Keypads as consist of Buttons which we can read the state of button with Arduino Digital Pin. when there are lot of inputs to read, it is not feasible too allocate one pin to each one of them. In this situations matrix keypad is useful.

if you consider reading a 25 inputs we can make 5*5 matrix which can implemented using 10 digital pins.

Internal Arrangement of Matrix Keypad is shown in fig.
Initially all switches are assumed to be released and there is no connection between Rows and Columns. when anyone of the switches are pressed the corresponding row and column is short circuited.... using this logic the button press can be detected.

How to write a Program to find the key pressed ?

The One of the technique to Identify the pressed keys are the method called Column Searching.
In This method particular Row is kept low and other rows are held High and logic state of each column line is scanned.

If a Particular is found to be having a state Low then that means that the key coming from in between that column and row.

steps to implement the program :

1.Declare the Row pins and column pins
2.initialize the key strokes with reference to the rows and cols as multidimensional array
3.set pin mode of Row pins to OUTPUTS
4.set pin mode of Column pins as inputs (remember this method is called column searching)
5.using for loop make one row pin Low each time and read the all column pins
6.if digitalRead returns low on col pins find the key using respective row and col numebrs.

The schematic of connections in proteus is

Arduino Code is:
/*
Keypad Interfacing with Arduino Without Keypad Library
 Author : Kunchala Anil
 It is implemented using a method called Column Searching
 */

const int row_pin[] = {
  5,4,3,2}; 
const int col_pin[] = {
  6,7,8}; // defining row and column pins as integer arrays

const int rows = 4, cols = 3; //defining the multi dimensional array size constants 

const char key[rows][cols] = {               // defining characters //for keystrokes in Multidimensional Array
  {
    '1','2','3'  }
  ,   
  {
    '4','5','6'  }
  ,
  {
    '7','8','9'  }
  ,
  {
    '*','0','#'  }  
};

void setup(){

  Serial.begin(9600); //begin the serial communication

  for(int i = 0; i<4; i++)
  {
    pinMode(row_pin[i],OUTPUT); //Configuring row_pins as Output Pins
    digitalWrite(row_pin[i],HIGH);//write HIGH to all row pins

    if(i<3)//we only have 3 columns
    {
      pinMode(col_pin[i],INPUT_PULLUP);//configure column pin as Input and activate internal //Pullup resistor
    }//end of if

  }//end of for loop

}//end of setup


void loop(){
  char key = read_key();
  if(key !='\n'){
    Serial.println(key);
    delay(100);
  }
}//end of loop

char read_key(){
  for(int row = 0;row < 4;row++)
  {
    digitalWrite(row_pin[0],HIGH);
    digitalWrite(row_pin[1],HIGH);
    digitalWrite(row_pin[2],HIGH);
    digitalWrite(row_pin[3],HIGH);
    digitalWrite(row_pin[row],LOW);
    //Serial.println(row_pin[row]);

    for(int col = 0;col<3;col++)
    {
      int col_state = digitalRead(col_pin[col]);
      if(col_state == LOW)
      {
        return key[row][col];
      }//end of if 
    }//end of col for loop
  }//end of row for loop
  return '\n';
}//end of read_key

Note : delay(100) is used to eliminate debounce 


you can see rows are changing the HIGH to LOW and and Low at column side when key is pressed.


Two Arduino's Communication with USART

In following schematic shows the connections to establish communication between two arduino's using Hardware Usart Arduino Uno connected to the keyboard scans the human inputs using keyboard and send the keystrokes as it is to the second arduino which shows the entered data.


Code for arduino connected to the Keypad (Tx) is :
#include <Keypad.h>

const byte ROWS = 4; // Four rows
const byte COLS = 3; // Three columns
// Define the Keymap
char keys[ROWS][COLS] = {
  {
    '1','2','3'  }
  ,
  {
    '4','5','6'  }
  ,
  {
    '7','8','9'  }
  ,
  {
    '*','0','#'  }
};
// Connect keypad ROW0, ROW1, ROW2 and ROW3 to these Arduino pins.
byte rowPins[ROWS] = { 
  5,4,3,2 };
// Connect keypad COL0, COL1 and COL2 to these Arduino pins.
byte colPins[COLS] = { 
  6,7,8 }; 

// Create the Keypad
Keypad kpd = Keypad( makeKeymap(keys), rowPins, colPins, ROWS, COLS );

#define ledpin 13

void setup()
{
  Serial.begin(9600);
}

void loop()
{
  char key = kpd.getKey();
  if(key)  // Check for a valid key.
  {

    Serial.print(key);
  }

}

we need arduino Keyboard library to compile the above code, can be found http://playground.arduino.cc/code/keypad

Arduino Connected to the Virtual Terminal(Rx) is:

#define password 123
#include<SoftwareSerial.h>
SoftwareSerial mySerial(10,11);//10-Rx  11-Tx
char data_buffer[15];
boolean read_data = false;
byte index;
void setup()
{
  Serial.begin(9600);
  mySerial.begin(9600);
  mySerial.println("welcome");
  mySerial.println("please enter password with starting letter * and ending letter # like *123#");
}

void loop(){

  if(Serial.available())
  {

    char input = Serial.read();
    if (input == '*')
    {
      read_data = true;
      index = 0;
    }
    else if(input == '#')
    {
      data_buffer[index] = 0;
      read_data  = false;
      mySerial.print("the value value you entered is");
      mySerial.println(atoi(data_buffer));
      if (atoi(data_buffer) == password){
        mySerial.println("password Matched");
      }
      else{
        mySerial.println("wrong Password");
      }
    }
    else
    {
      if(read_data)
      {
        data_buffer[index] = input;
        index = index + 1;
      }
    }
  }
}//end of loop

please see the video below to see how the schematic is done


Wednesday 27 May 2015

Proteus Virtual Terminal using Arduino Hardware and Software Serial

Proteus schematic :

Arduino Code:

#include<SoftwareSerial.h>
SoftwareSerial mySerial(10,11); // 10 - Rx    11 -Tx

void setup()
{
mySerial.begin(9600);

Serial.begin(9600);

}

void loop()
{
 Serial.println("enter  char");
 while(!Serial.available())
 {
 //wait until user enters the data
 }

 if(Serial.available())
{
 mySerial.println(Serial.read());
 }

}

Video :

Friday 22 May 2015

Arduino Serial communication in proteus using Virtual Terminal

we can simulate the arduino serial communication using virtual terminal in the proteus

virtual terminal in proteus is located at instruments logo which highlighted as Instruments and can be located
virtual termina;
in the instruments we can choose the virtual instrument

we can select the serial transmission characteristics such as baud rate, parity... etc

virtual terminal

code which is dumped into Arduino is

const int pin = 13;
void setup()
{
pinMode(pin,OUTPUT);
Serial.begin(9600);
Serial.println("enter y to ON and n to OFF");
}

void loop()
{
while(!Serial.available())
{
//wait until user enters the data
}

if(Serial.available())
{
char input = Serial.read();
switch(input)
{
case 'y':
Serial.println("you entered y led ON");
digitalWrite(pin,HIGH);
break;
case 'n':
Serial.println("you entered n led is OFF");
digitalWrite(pin,LOW);
break;
default:
Serial.println("you entered wrong character");
}//end of switch
}//end of If

}//end of loop

Thursday 21 May 2015

Arduino Relay driver using optocoupler in Proteus

In relay On condition
arduino_relay_ON

In relay Off condition
arduino_relay_off

Arduino Code is


const int pin =13;

void setup(){
pinMode(pin,OUTPUT);
Serial.begin(9600);
Serial.println("Please enter a char");
}

void loop(){
Serial.println("Please enter y to ON and n to OFF led");
while(!Serial.available())
{
//wait until user enters the data
}

char input;
if(Serial.available())
{
Serial.println(input = Serial.read());
if(input == 'y'){
Serial.println("you entered y led is ON");
digitalWrite(pin,HIGH);
}
else if(input == 'n'){
Serial.println("you entered n led is OFF");
digitalWrite(pin,LOW);
}
else{
Serial.println("you entered a wrong character");
}
}
}

Wednesday 20 May 2015

Adding Arduino Library to proteus 8

when i googled to add arduino library to proteus8 version there are many examples came But I still faced the problem while installing arduino library in proteus version 8.

the usual procedure to add library is
1.download the library
2. paste it in your LIBRARY folder

the problem is I don't find the library folder in program files
so i clicked on the L in the P L device menu

library

and by clicking create library we can know the path where the LIBRARY folder is

Arduino Proteus8 turorial

simulation of arduino controlling relay.. step 1: when you double click on the Proteus8 icon the window open like this

home

step 2: go to FILE and click on NEW PROJECT a new project wizard is open like this new_project_wizard select a name and path for it and click next step 3: create the default schematic schematic click on the create schematic from the selected template and choose DEFAULT and select option for no pcb layout and and no firmware as shown in figures below pcb layoutfirmware and click finish finish after clicking finish we get a empty schematic like this empty schematic I assume that you installed Arduino Proteus library -- if not google it you can find many tutorials of how to do it. at the left panel we have some control tools to add components to the schematic control In above picture the highlighted one having names P L DEVICES when we click on P we have option to pick components pick devices IF you type Arduino in search bar you get the window like this arduino_pick select arduino UNO and click ok to add it to the devices for this we are gonna need following components 1.ULN2003 IC - relay driver 2.relay 3.dc source 4.ac source 5.lamp ULN2003 IC-- we can get this using search bar uln2003 and relay,lamp and ac source using keywords relay,lamp and alternator respectively but for dc source it took me some time to figure out what to do... we can get dc source from generator mode generator by clicking the symbol generator_sign and selecting DC dc_select and after aligning all these in the schematic get to this. arduino_relay to dump the code follow this procedure Using Arduino IDE type the following code void setup() { pinMode(13,OUTPUT); } void loop() { digitalWrite(13,HIGH); delay(1000); digitalWrite(13,LOW); delay(1000); } before verifying the code goto File -- Preferences in Arduino file menu select compilation as shown in fig preferences and press the verify button code_file copy the highlighted section and paste it in paste the above window comes by double clicking the arduino uno.. and run the simulation we can see the lamp is ON and OFF sequentially.

Tuesday 19 May 2015

Using relay with Arduino

references :

http://www.electronics-tutorials.ws/io/io_5.html

http://www.electroschematics.com/8512/microcontroller-relay-interface-and-driver/

https://electrosome.com/interfacing-relay-8051-keil-c/

Thursday 14 May 2015

VFD & arduino

references :

https://deltautomation.wordpress.com/2011/04/29/plc-vfd-comunication/

http://fightpc.blogspot.in/2014/10/vfd-control-with-arduino-using-rs485.html

http://www.avrfreaks.net/forum/vfd-microcontroller

controlling VFD with arduino...

i made a simple code to control VFD (change the speed and direction of ac drive) with arduino.

/*
Author : Kunchala Anil [anilkunchalaece@gmail.com]

Interfacing VFD with Arduino Via RS485 using MODBUS Protocol
MODBUS protocol
-------------------------------------------------------------------------
| Start Bit | Address | Function_Command | DATA | LRC or CRC | Stop bit |
| : | 2bytes | 2 bytes | | 2 bytes | \r\n |
-------------------------------------------------------------------------

Function Code : The format of data characters depend on function codes
The available function codes are described as follows:
0x03 : Read data from register
0x06 : Write single data to register
0x10 : Write multiple data to registers

MODBUS Protocol can be implemented in two ways ASCII or RTU(Remote Terminal Unit)
iam gonna use ASCII mode for this example

____________________________________________________________________________
| Content Address Functions
|-------------------------------------------------------------------------
| B1 B0
| 0 0 --> NO function
| Bit 0 - 1 0 1 --> Stop
| 1 0 --> Run
| 0x2000 1 1 --> Jog + Run
|
| Bit 2 - 3 Reserved
|
| B5 B4
| 0 0 --> No function
| Command Bit 4 - 5 0 1 --> FWD
| Read / Write 1 0 --> REV
| 1 1 --> Change Direction
|
| Bit 6 - 15 Reserved
|
| 0x2001 Frequency Command
|
|__________________________________________________________________________________


Command Address B15 B14 B13 B12 B11 B10 B9 B8 B7 B6 B5 B4 B3 B2 B1 B0 Hex Equalent
RUN 0x2000 0 0 0 0 0 0 0 0 0 0 0 1 0 0 1 0 0x0012
STOP 0x2000 0 0 0 0 0 0 0 0 0 0 0 1 0 0 0 1 0x0011
Format if data send to the VFD
':' --> Start bit in Ascii mode
\r\n --> Stop bit


*/

//commands values
#define VFD_START 1
#define VFD_STOP 2
#define VFD_SPEED 3

#define MAX_SIZE 20 // max size of data buffer

char speed_vfd[] = ":01062001";
const char start_vfd[] = ":010620000012C7\r\n";
const char stop_vfd[] = ":010620000011C8\r\n";
char data_buffer[MAX_SIZE];

void setup(){
Serial.begin(9600);
}//end of setup


void loop(){

serial_ask(); /* ask question the user to enter
1 to start the VFD
2 to stop the VFD
3 to set the speed of VFD */
int val = serial_check(); /* wait for user to enter the data and convert
it to Int and return value into function */
perform_action(val); /* perform the action based on the user entered value
which is passed to the function */

}//end of loop


/*
SERIAL_ASK() FUNCTION : this function is used to ask the user to enter the user choice via Serial monitor
*/
void serial_ask(){
Serial.println("Please Enter all values followed by \n");
Serial.println("Please enter the valid code to perform");
Serial.println("-------------------");
Serial.println("CODE\t ACTION");
Serial.print(VFD_START);Serial.println("\t START VFD");
Serial.print(VFD_STOP);Serial.println("\t STOP VFD");
Serial.print(VFD_SPEED);Serial.println("\t SET SPEED");
Serial.println("-------------------");
}//end of serial_ask() fucntion


/*
SERIAL_CHECK() FUNCTION : this function is used to receive the data into data_buffer
*/
int serial_check(){
while(!data_received())
{
//wait until full data is received
}//end of while
return atoi(data_buffer);
}//end of serial_check() function


boolean data_received(){
static byte index = 0;
while(!Serial.available())
{
//wait until user enter the data
}

if(Serial.available())
{
char input = Serial.read();
if(input !='\r')
{
data_buffer[index] = input;
index = index + 1;
}else
{
data_buffer[index] = 0;//null terminate the character array to make it string
index = 0;
return true;// we received the full code return true
}//end of ifelse condition
}
return false;
}//end of data_received()) function

void perform_action(int val){
switch(val)
{
case VFD_START:
Serial.println("VFD START");
VFD_control(start_vfd);
break;

case VFD_STOP:
Serial.println("VFD STOP");
VFD_control(stop_vfd);
break;

case VFD_SPEED:
Serial.println("SET SPEED");
set_speed();
break;

default:
error_message();

}//end of switch
}//end of perform action

void VFD_control(const char* command){
Serial.print(command);
Serial.println();
}

void set_speed(){
char freq_hex[4];//temporary string for sprintf
Serial.println("Set Speed");
Serial.println("enter the frequency");
int freq = serial_check();
Serial.print("the frequency you entered is");
Serial.println(freq);
sprintf(freq_hex,"%04X",freq);//convert it to hex using sprintf
strcat(speed_vfd,freq_hex);
cal_LRC();

}//end of set_speed() fucntion

void cal_LRC(){
int val = calculate(); //function to calculate the decimal value
convert_to_hex(val);// function to convert the decimal value to HEX
}//end of cal_LRC() fucntion


//CALCULATE() FUNCTION
int calculate(){
int val[strlen(speed_vfd)/2]; // val[] array is used to store the decimal value for two HEX digits
for (int i = 1, j = 0 ; i < strlen(speed_vfd); i = i+2, j++ ) //i = i+2 because we are finding the decimal equalent for two HEX values
{
val[j] = conv(speed_vfd[i],speed_vfd[i+1]); // function to convert Two Hex numbers into Decimal Value

}//end of for loop

int sum = find_sum(val); // function to calculate total sum of decimal equalents
return sum;
}//end of calculate() function

//FUNCTION_SUM() FUNCTION
int find_sum(const int * val) // we are passing an array to the function
{
int sum = 0;
for(int i=0;i<= (strlen(speed_vfd)/2) - 1;i++)
{
sum = sum + val[i];
}//end of for loop
return sum;
}//end of find_sum() function

//FUNCTION TO CONVERT HEX TO THE DECIMAL VALUE
int conv(char val1,char val2){
int val_a = toDec(val1); // convert to the decimal value
int val_b = toDec(val2);
return (val_a*16) + val_b; // converting decimal value into HEX decimal Equalent B1*16 + B0
}//end of conv() function

int toDec(char val){
if(val<='9')
{
return val - '0'; // please see the ASCII table for clarification
}
else
{
return val - '0'-7; // 7 is offset for capital letters please see the ASCII table
}

}//end of toDec() function

void convert_to_hex(int val){
char hex[5];
utoa((unsigned)val,hex,16); // utoa() function is used to convert unsigned int to HEX array (whatever the base we specified as third argument)

int hex_val = (int)strtol(hex,NULL,16);// strtol() is used to covert string into long int according to the given base

hex_val = ((~hex_val) + B01) & 0xff; /* finding the 2's complement of the number hex_val
'~' operator is the logical not and adding B01 to it and logical anding with 0xff
to omit any excess bites otherthan 8 bits or 1 byte
*/
Serial.print("the LRC value is : ");
Serial.println(hex_val,HEX);
char hex_val_str[4];
sprintf(hex_val_str,"%0.2X",hex_val);// putting hex value in the string back
Serial.print("the concated string is : ");
strcat(speed_vfd,hex_val_str);
char ter[] = "\r\n";
strcat(speed_vfd,ter);//adding terminators at the end STOP bits
Serial.println(speed_vfd);
}//end of convert_to_hex() fucntion


void error_message(){
Serial.println("You Entered Wrong Command");

}//end of error_message()

it actually doesn't do anything.. we can modify the code to send the modbus control to the VFD.
I don't have the hardware to test it But i made the code using VFD-m Manual
delta VFD-m

Arduino & load cell

references :

http://flowrc.co.uk/load_cell_stage_3.html

http://dailylearningnotes.blogspot.in/2010/03/working-with-load-cell-2.html

http://christian.liljedahl.dk/guides/arduino-and-load-cell


http://www.mechtechplace.net/mech-tech-electronics/building-a-low-cost-strain-gage-load-cell-amplifier/

Friday 8 May 2015

Finding a Two's complement of a number


void setup(){
int a= 10;
int val = b;
Serial.begin(9600);
a = ~a ; //inverting the number
a = a+B01 ;//addinf the 1 to it
a = a & 0xff;//anding with 0xff to avoid any bit overflow
Serial.print("the 2's complement of ");
Serial.print(val,BIN);
Serial.print("is : ");
Serial.println(a,BIN);
}

void loop(){
}

LRC calculation for MODBUS ASCII Protocol In Arduino

In MODBUS Ascii mode each 8 bit data is the combination of two ascii characters
for ex: a 1 byte data 64H is shown as '64' in ASCII, consist of '6'(36 Hex) and '4'(34 Hex) (i still need to figure out the difference between those and standard ASCII values)

to calculate LRC for frame ":010304010001"
we need to add 01H + 03H + 04H + 01H + 00H + 01H = 0aH,
the 2's complement negation of 0aH is f6H

code to perform this is

/*
Author : Kunchala Anil
Calculating the LRC of HEXA numbers used in MODBUS ASCII

In MODBUS ASCII protocol : is used as starting word
The special function used in this code is utoa() and strlen() and sprintf()

utoa() --> unsigned integer to String for base conversion

syntax : utoa((unsigned int)val , string , base)

where val : is the value to be converted into base N format
string : is the temporary string to store the converted value
base : base is the Radix which val is converted (in this code it is 16)

strtol() --> string to long int

syntax : strtol(str,end_ptr,radix)
str : string to be converted
end_ptr : end pointer (NULL)
base : radix of the system

sprintf() --> string print function

syntax : sprintf(str,format)
str : destination string where output is stored

*/
char a[] = ":010304010001"; // ASCII string lrc being added

void setup(){
Serial.begin(9600); // start the serial communication
Serial.print("The string to which LRC is calculated is : ");
Serial.println(a);
int val = calculate(); //function to calculate the decimal value
convert_to_hex(val);// function to convert the decimal value to HEX
}//end of setup()

void loop(){
//do nothing here
}//end of loop()

//CALCULATE() FUNCTION
int calculate(){
int val[strlen(a)/2]; // val[] array is used to store the decimal value for two HEX digits
for (int i = 1, j = 0 ; i < strlen(a); i = i+2, j++ ) //i = i+2 because we are finding the decimal equalent for two HEX values
{
val[j] = conv(a[i],a[i+1]); // function to convert Two Hex numbers into Decimal Value

}//end of for loop

int sum = find_sum(val); // function to calculate total sum of decimal equalents
return sum;
}//end of calculate() function

//FUNCTION_SUM() FUNCTION
int find_sum(const int * val) // we are passing an array to the function
{
int sum = 0;
for(int i=0;i<= (strlen(a)/2) - 1;i++)
{
sum = sum + val[i];
}//end of for loop
return sum;
}//end of find_sum() function

//FUNCTION TO CONVERT HEX TO THE DECIMAL VALUE
int conv(char val1,char val2){
int val_a = toDec(val1); // convert to the decimal value
int val_b = toDec(val2);
return (val_a*16) + val_b; // converting decimal value into HEX decimal Equalent B1*16 + B0
}//end of conv() function

int toDec(char val){
if(val<='9')
{
return val - '0'; // please see the ASCII table for clarification
}
else
{
return val - '0'-7; // 7 is offset for capital letters please see the ASCII table
}

}//end of toDec() function

void convert_to_hex(int val){
char hex[5];
utoa((unsigned)val,hex,16); // utoa() function is used to convert unsigned int to HEX array (whatever the base we specified as third argument)
int hex_val = (int)strtol(hex,NULL,16);// strtol() is used to covert string into long int according to the given base
hex_val = ((~hex_val) + B01) & 0xff; /* finding the 2's complement of the number hex_val
'~' operator is the logical not and adding B01 to it and logical anding with 0xff
to omit any excess bites otherthan 8 bits or 1 byte
*/
Serial.print("the LRC value is : ");
Serial.println(hex_val,HEX);
char hex_val_str[4];
sprintf(hex_val_str,"%0.2x",hex_val);// putting hex value in the string back
Serial.print("the concated string is : ");
strcat(a,hex_val_str);
char ter[] = "\r\n";
strcat(a,ter);//adding terminators at the end or STOP bits
Serial.println(a);
}//end of convert_to_hex() fucntion


output
LRC_output

Playing with Strings, HEX and Integer values.

In the past few days I have tough time converting Inter values into Hex values and how to store them in strings.
If once i stored them How to get their Hex representation Back..

first of all.. Int is a Data type where HEX is a Data representation
so if i wanted to convert Int To HEX and send the value through Serial Hardware
i can do something like this

int val = 100;
void setup(){
Serial.begin(9600);
Serial.print(val);
}
void loop(){
}


output:
3e8

ok HEX representation of 1000 is 3e8 and it is converted and send through serial hardware.
But what if we wanted to store that Equivalent Hex value into some variable or assign that value to another variable?

So we need a way to store that converted Hex value. but to which data type we need to store the HEX value?
like i said before HEX is not a datatype it is a data representation. even though it is holding a integer value we cannot assign it to the int datatype because of characters A to Z.

One possible solution is using strings.so we need to perform the conversion and store that value in string

hopefully there is a function call that will do the work for us it isutoa()
utoa --> unsigned int to String Base conversion
syntax : utoa((unsigned int) val,string,base)
where val is the val converted to Hex format
string is char string which holds output after conversion
base is radix for conversion 0,8,16

utoa()

Convert an unsigned integer into a string, using a given base

Synopsis:
#include

char* utoa( unsigned int value,
char* buffer,
int radix );
Arguments:
value
The value to convert into a string.
buffer
A buffer in which the function stores the string. The size of the buffer must be at least:
8 × sizeof( int ) + 1

bytes when converting values in base 2 (binary).

radix
The base to use when converting the number.


simple code to demonstarte this conversion is

int val = 1000;

void setup(){
char str[4];
utoa((unsigned int) val,str,16);
Serial.print("the val is : ");
Serial.println(val);
Serial.print("the HEX converted string is : ");
Serial.println(str);
}

void loop(){
}


output:
the val is : 1000
the HEX converted string is : 3e8

we commonly use 2 bytes or 4 bytes as HEX representation.. so if we wanted to represent 1000 in HEX 4 byte format we write something like 03e8. we add zero before MSB to make it 4 bytes But Arduino doesn't it do that automatically for us. so we somehow has to tell Arduino that we need to print fixed bytes representation because this will cause major problem if we wanted to send the hex value in the middle of string.

this is done using sprintf() function
sprinf() : string print function which is used to store the string in specified format

which dones same duty as printf but rather than printing to standard io it format the data and store it in string

syntax:sprintf(str,format,arguments)
where str is the string where formatted data is stored
format is used to specify the format
arguments is the arguments supplied to arguments

Here format is the key thing that do the job
that can be explained using the following c program

#include
int main() {
int data = 29;
printf("%x\n", data); // just print data
printf("%0x\n", data); // just print data ('0' on its own has no effect)
printf("%8x\n", data); // print in 8 width and pad with blank spaces
printf("%0.8x\n", data); // print in 8 width and pad with 0's
getch();

return 0;
}


and the result is
sprintf format

code to convert int to hex and store to the string with 4 bytes representation is

int a = 1000;
void setup(){
Serial.begin(9600);
char str[4];
sprintf(str,"%0.4x",a);
Serial.print("the HEX converted string is : ");
Serial.println("str");
}

void loop(){
}


those are used when we wanted to use functions like strcat() to concate strings

But what if we have a HEX string and wanted to get the int value back from the string. in this case atoi() won't help us because it only convert integer string not HEX string

in this code strtol() will be useful.
strtol --> string into long integer
convert a string into long integer according to the given Base.

syntax: strtol(str,end_ptr,base)
str : string which converted
end_ptr: end pointer
base : radix of values stored in string
it returns the long int value we need to cast to int if wanted to assign it to int variable
The function first discards as many whitespace characters as necessary until the first non-whitespace character is found. Then, starting from this character, takes as many characters as possible that are valid following a syntax that depends on the base parameter, and interprets them as a numerical value. Finally, a pointer to the first character following the integer representation in str is stored in the object pointed by endptr.


char str[] = "03e8";
void setup(){
Serial.begin(9600);
int val = (int)strtol(str,NULL,16);
Serial.println(val);
}
void loop(){
}


Output:
1000

the functions do our bidding is:
utoa -- unsigned int to ascii string with base
utoa(int val, char* str, radix)

strtol -- string to long int
strtol(str,end_ptr,radix)

sprintf -- string printf
sprintf(string,format)

Wednesday 6 May 2015

converting Decimal to HEX values in Arduino

while i am searching for a way to send the HEX values rather than Int / char values using Arduino Serial communication. i find that Serial.print() will do the work for me.

void setup(){
int a = 17;
Serial.begin(9600);
Serial.print("value of a :"); Serial.println(a);
Serial.print("HEX equalent of a :"); Serial.println(a,HEX);


}

void loop(){
//do nothing
}

and the output is like
hex equa

it is good enough to do the work for me But there is a chance of error if i wanted to send a value in the middle of array.

the problem arise when we wanted to print leading zeros for fixed two byte and 4 byte HEX values
if we wanted to print values 1 and 1000,we get hex equivalents as
leading zero problem

which is printed by omitting zero's. and doesn't specify the no of HEX digits in outputs

so serial.print(var,HEX) won't print the HEX values with Leading zeros. we need to find a way to do it.

In C there is a function called sprintf() which will be the saviour of our day.
It is used to format a string which is used to print at the output

the syntax of sprintf is
sprintf(char *str,const char* format)

But first we wanted to print hex values so we need to know the different HEX format specifiers.
we can simply know by compiling and running this simple code

#include
int main() {
int data = 29;
printf("%x\n", data); // just print data
printf("%0x\n", data); // just print data ('0' on its own has no effect)
printf("%8x\n", data); // print in 8 width and pad with blank spaces
printf("%08x\n", data); // print in 8 width and pad with 0's

return 0;

and the result is
HEX format specifier

by using both format specifiers and sprintf we can print the hex value as it is

void setup(){
Serial.begin(9600);
int a = 0x0094;
Serial.println(a);
Serial.print("serialprint using HEx : ");
Serial.println(a,HEX);
print_hex(a);
}
void loop(){

}

void print_hex(int val){
char str[20];
sprintf(str,"%04x",val);
Serial.print("serialprint using print_hex function : ");
Serial.println(str);
}//end of printhex() function


and the output is
print_hex function


But what if we wanted to convert a decimal value to HEX and sent it as HEX?
we can use the below code to do that.

/*
Author : Kunchala Anil
converting Decimal value into HEX
*/
#define max_hex_length 4

char data_buffer[20];
int hex[4];

void setup(){
Serial.begin(9600);
}//end of main()


void loop(){
int a = serial_ask();
Serial.print("the value you entered is :");
Serial.println(a);
convert_to_hex(a);

}//end of loop

void convert_to_hex(int a){
for (int i=0; i = 0; j--){
if (hex[j] <= 9){
Serial.print(hex[j]);
}
else{
switch(hex[j]){
case 10 :
Serial.print('a');
break;

case 11 :
Serial.print('b');
break;

case 12 :
Serial.print('c');
break;

case 13 :
Serial.print('d');
break;

case 14 :
Serial.print('e');
break;

case 15 :
Serial.print('f');
break;

default :
Serial.println("something wrong");
}//end of switch
}//end of If Else Condition

}//end of for loop
Serial.println();

}//end of convert_to_hex() function


int serial_ask(){
Serial.println("enter the Integer decimal value coverted to the HEX");

while(!data_received()){
//wait until full data is received
}
return(atoi(data_buffer));

}//end of serial_ask() fucntion

boolean data_received(){
while(!Serial.available()){
//wait until user enters the data
}
if(Serial.available()){
static byte index = 0;
char input = Serial.read();
if(input != '\r'){
data_buffer[index] = input;
index ++;
}
else {
data_buffer[index] = 0;//terminating with NULL to make char array as string
index = 0;
return true;

}//end of If Else condition

}//end of IF condition
return false;
}//end of data_received() function


and the output is
dec to hex